I take a nap for a few minutes (hours) and I come back to this wake of disaster. I'm so proud of you guys. 
The Shaving Cadre
You are using an out of date browser. It may not display this or other websites correctly.
You should upgrade or use an alternative browser.
You should upgrade or use an alternative browser.
Life On the Wee Woo Box
- Thread starter bentheduck
- Start date
Dave in KY
Shave Newbie
Nothing that can be detected using "traditional" methods...all back- ally stuff I promise. I think he's good to go.I sure hope you're able to pass that drug test after using that back alley stuff! Never know what @CBLindsay slipped into that soap.
Bruce speaks the truth!After boot camp, yelling and screaming rolls off my back like water off a duck. Navy chiefs are very creative in their use of adjectives.
- Pre-shave: Warm shower and apricot scrub
- Razor: Vector
- Blade: Feather of some sort
- Brush: Pea Soup
- Soap: CBL Premium Barbershop
- Aftershave: Thayer's Lavender, Fine American Blend balm, Monkey Butt
- Frag: TBD
- Music: Matt and Kim
@GearNoir inspired this shave, and boy was it a good one. I absolutely adore the scent, and the performance is what dreams are made of if you dream of amazing shave soap performance. The Vector zipped around and got me mostly BBS, I managed to miss a spot. Oh well. Monkey Butt is working hard today so far, but it is indeed working.
No picture.jpg
Something light and fun to get the day started.
I've been looking into switch cell phone carriers. Google Fi is doing just fine, but I'm just waiting for it to fall apart because I've seen so many horrific stories on reddit. AT&T is probably the destination because I get one hell of a discount, and I really enjoyed the service when I had it previously. I'll just have to think it through just a bit more. I hope you're all well. Thanks for reading, Cadre.
woodpusher
TSC’s International Man of Meh
Patelliott
"I NEED NurseDave's Energy"
Nice read Ben!
Shavin’ Yeti
Sr. Shave Member
I am going to use this as a guide for my Ever Ready 100T restoration project.Restoration progress...
So I'll start by saying I'm really bad at taking pictures and remembering where I was in the process.
View attachment 4429
This is just after I started with 320 to really take that damn Dremel damage out. It took a few minutes, but I got it out. I also did the rest of the handle without much drama.
View attachment 4431
There was a notch that prevented the cup from rotating during use and needed to be removed. Again, a few minutes of 320 did the trick. It's notable that the handle is made up of different parts that are glued together. With the being said, holy crap those parts are sharp. I sliced up my index finger pretty good, but no blood.
View attachment 4432
I want to say this is at the end of 800 or maybe the beginning. Who knows. I don't. Moving on. After cleaning up the damage the rest of the sanding was straightforward and easy.
View attachment 4433
This is at the end of my *cough* first time finishing with the 5000. I say first time because I started applying Flitz with my Dremel and immediately caused damage from the higher than expected RPM. That happened twice and resulted in me going back to remove material to clean it up, not a big deal, just heartbreaking.
Aaaaand the almost finished product...
View attachment 4434
View attachment 4435
View attachment 4436
I ended up applying the Flitz with a paper towel with very nice results. As you can see, this thing polished up beautifully.
The only things left are to put on some silver leaf Rub n Buff on the bottom to fill in the lettering, secure the weights (25 pennies) with epoxy probably, and install the knot.
I'm stuck between installing a 22mm or 24mm again. I think I can take off enough material to make an appropriate amount of space for a 24, but it'll be time consuming.
Thoughts, suggestions, and beer recommendations are very welcome.
Holler if you need any pointers. Bon chance!I am going to use this as a guide for my Ever Ready 100T restoration project.
- Pre-shave: Warm shower and apricot scrub
- Razor: RR Wunderbar
- Blade: an apparently dead Wizamet
- Brush: Graydog PIF
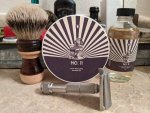
- Soap: Oleo No. 11
- Aftershave: Thayer's Lavender, Oleo No. 11
- Frag: none
- Music: The Fall of Troy - Mukiltearth
Today merited a scent that makes me smile because of what happened after my shift. I'll get to that in a bit. As much as I wanted this to be a perfect shave, I drew a little blood and the blade was a touch tuggy. I'm hindsight I should've installed a new blade for a truly wonderful shave. Oh well. 3.5 passes and I'm DFS. I guess even when having a subpar shave I know not to push it with the effort. Venessa very much approves of the scent.m, so I guess that'll be a full bottle purchase of the original scent.

New FoT. I'm not super high on it so far. I'll have to listen to it a few more times to get a feel for it. But so far, I feel the production sucks.
So yeah, after work, I typically hang out and destress so that I don't bring my frustrations home with me. Today I got a little carried away and stayed a couple of extra hours. Tones drop for a major accident within sight of the station, a quick look over at the address at least reveals that nothing is flying or on fire. Long story short, we did CPR for a bit and got his pulses back. The lead medic said that the patient was trying to knock the COVID testing swab away just before we left. I'm super hesitant to say that we got a save, but I think me might've pulled it off. The lead medic is super salty, but I can tell he feels like he's on top of the like I do. What. A. Day. I hope you're all well. Thanks for reading, Cadre.
woodpusher
TSC’s International Man of Meh
You done did good, Ben. 
Dave in KY
Shave Newbie
Atta Duck Ben.................................I mean Atta Boy Ben
Patelliott
"I NEED NurseDave's Energy"
Great read Ben, and awesome job today!


