Actually when the propane pressure is up that high, the doors are usually closed to hold in the heat. I turn the valve on the side down just before opening it to remove the piece for working. Saves arm hair and eyebrows that way.Just watched the forge video. I hope you have some good shielding in the gonadal region when you use it. Those flames look like they shoot out pretty far.
The Shaving Cadre
You are using an out of date browser. It may not display this or other websites correctly.
You should upgrade or use an alternative browser.
You should upgrade or use an alternative browser.
Shawn's forging shed
- Thread starter ShawnF
- Start date
could get a small section of railroad track( not a current line) and use it , i have heard of some using that as an anvil until they get one. just a thought..sorry to put in my .02....instructables even has a guide to make the railroad anvil..I keep making my son read your posts because HE thinks he can forge weld all sorts of random chunks of metal into the coolest things using his fire pit forge and my old broken hammer. I'm not sure what he thinks he is going to use as an anvil because we don't have one. Needless to say he has nothing on you.

Railroad Track Anvil
Railroad Track Anvil: I'd rather have a real anvil, too, but have you priced one lately? This one didn't cost me anything, if you take out some welding rods and a nut and bolt. An equivalent 50 lb. standard anvil you would buy from a quality blacksmith supply compan…
Last edited:
g
Great info.@CBLindsay If he really wants to start forging Chris, he can get started for little to no money. A hole in the ground or a wooden box filled with dirt and a bit of a pit hollowed out is all he would need for a forge. A piece of pipe coming into the side of the pit to hook an old hair dryer onto makes a servicable blower. Charcoal is cheap fuel, yet burns hot and clean. A 1 to 2 pound yardsale ball peen hammer. (or both) And an 8 or 10 pound sledgehammer head in a stump or log piece for an anvil.
Hollow out a bit of a hole in the log end to stick the hammer head in keeping one face up, fill the pit with charcoal and light it, mound it up over the coals and turn the hair dryer on, stick the end of the steel into the hot core of the charcoal pile, pull it out when orange and beat it with the ball peen.
Same thing I did when I made GearNoir's knife for the exchange, only I used coal in a metal pot with a hand crank blower, and a small anvil instead of a hammer head.
As far as a complaint that the hammer head would be too small for an anvil, you are only going to move as much area as your swung hammer head will cover. As long as you have that much, you are good. Charlie Lewis makes amazing razors on a post anvil. A piece of 3 inch diameter solid round stock stood on end.
You really can do a lot with very little in this hobby.
All this talk of anvils, forges, and liquefying a Dodge Neon makes me want to do things I know nothing about and have little time to do it. I think my chest hair just grew onto my arms and back from all the testosterone around here. Oh, wait, that happened long ago...the hair...not the testosterone! 
could get a small section of railroad track( not a current line) and use it , i have heard of some using that as an anvil until they get one. just a thought..sorry to put in my .02....instructables even has a guide to make the railroad anvil..

Railroad Track Anvil
Railroad Track Anvil: I'd rather have a real anvil, too, but have you priced one lately? This one didn't cost me anything, if you take out some welding rods and a nut and bolt. An equivalent 50 lb. standard anvil you would buy from a quality blacksmith supply compan…www.instructables.com
NO!! No non no no no no no..... Don't do that..... I absolutely hate when guys like that put any form of the word instruction in the title to make people think the bullsh*t they are pumping out is any form of real knowledge.
That "looks" like an anvil but is the most useless thing you could have. You have ruined two pieces of useable steel to make a paperweight.
First of all, that's not a railroad track. That is from an overhead crane or a small transfer line for something like carts in a plant. A railroad rail has a much thicker top rail. It will also be rounded. More on one side actually from the train wheels. That piece of steel would never hold a 280,000 pound rail car, much less 50 to 100 (or more) of them.
Second, while you can use a piece of rail, you stand it up on end and use the end of the top rail (thick part) to put more mass under your work and hammer. Placed like that, the lack of mass and flex in the web take probably 80% of your energy away from your work.
Third. Heating the leaf spring to red in a grill!?!? Really!?!?!
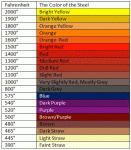
How many grills do you see that hit 1200 degrees?? And at dull red you still aren't going to move a high carbon steel easily. You would have trouble with a bar and well mounted vise let alone trying to hammer it flat on a piece of rail laid flat.
Fourth. Welding the spring on top is pointless and makes the whole rail idea even more useless. You have a gap now where the spring is going to be separate from the track. I don't care how tight you clamp it, unless it is welded 100% through underneath it, you have a gap.
Now you have lost even more mass and energy return.
Fifth, leaf spring isn't a water quenching steel, it is an oil quenching steel. Also, heating it to red hot and dunking in water or some sort of coolant is quenching NOT tempering. Tempering is reducing the amount of hardness that you put in it quenching it.
The heat treating process involves heating steel to it's critical temperature (not just red) to allow austenite to form, then quenching or rapid cooling to allow it to change to martensite. This freezes the grain structure of the steel in a very compact form making it hard, yet brittle. The tempering process that is done after this step, relaxes that grain structure a bit to make it stronger and less brittle. This step varies depending on the alloy, temperature, and time held at that temperature, as well as the toughness you are trying to get for the intended use.
Quenching a piece of 5160ish steel in water is just asking for a lot of cracks in the steel. Could be a spiderweb of micro-fractures to just popping in half. With the rail and spring welded together, you increase the chance because the two different alloys and masses will have different cooling rates. The thin piece of spring will cool rapidly, yet the thick rail will take longer. More so because of the gap between the two holding heat. When the spring cools and shrinks, the hot rail being thicker and not wanting to warp will just rip apart the spring.
Then you are going to start hammering on it at it's most brittle stage because you haven't actually tempered it.
The reason I said 5160 ISH, is because while 5160 is a common leaf spring steel, it is not the only alloy used. So without a mill spec sheet, you have no real idea what steel you are even working with to know the proper time and temperature for tempering without breaking test samples to test strength and examine the grain structures after trying different combinations.
I've done a lot of those stupid things starting out from "learning" things from people like that. That's why it irks me so bad. I've been through the stupid things and figured out the hard way how to do it correctly.
P.S.
Sorry if it sounded like I was yelling at you, I wasn't. People like that just irritate me and cause others a lot of headaches "teaching" them the wrong things to do.
Last edited:
Shawn is right. I always encourage people to get a real anvil if possible. It doesn't need to be in great shape. Proper tools actually keep you safe. Tongs that fit your hot steel, a great anvil will hold your work well as you strike it with a decent and correct hammer.
g
Good to know, so forget the instructable and forget my dumb idea of a piece of actual railroad track !!!!!!!!!! all i was going by was what was shown online and as you can tell i dont know Anything about that and I prefer to learn from people like you since i know You know what you are doing..... we all good @ShawnF ? and BTW the razor you sharpened for me is still doing great, thanks again to you and monkey.....NO!! No non no no no no no..... Don't do that..... I absolutely hate when guys like that put any form of the word instruction in the title to make people think the bullsh*t they are pumping out is any form of real knowledge.
That "looks" like an anvil but is the most useless thing you could have. You have ruined two pieces of useable steel to make a paperweight.
First of all, that's not a railroad track. That is from an overhead crane or a small transfer line for something like carts in a plant. A railroad rail has a much thicker top rail. It will also be rounded. More on one side actually from the train wheels. That piece of steel would never hold a 280,000 pound rail car, much less 50 to 100 (or more) of them.
Second, while you can use a piece of rail, you stand it up on end and use the end of the top rail (thick part) to put more mass under your work and hammer. Placed like that, the lack of mass and flex in the web take probably 80% of your energy away from your work.
Third. Heating the leaf spring to red in a grill!?!? Really!?!?!
View attachment 6491
How many grills do you see that hit 1200 degrees?? And at dull red you still aren't going to move a high carbon steel easily. You would have trouble with a bar and well mounted vise let alone trying to hammer it flat on a piece of rail laid flat.
Fourth. Welding the spring on top is pointless and makes the whole rail idea even more useless. You have a gap now where the spring is going to be separate from the track. I don't care how tight you clamp it, unless it is welded 100% through underneath it, you have a gap.
Now you have lost even more mass and energy return.
Fifth, leaf spring isn't a water quenching steel, it is an oil quenching steel. Also, heating it to red hot and dunking in water or some sort of coolant is quenching NOT tempering. Tempering is reducing the amount of hardness that you put in it quenching it.
The heat treating process involves heating steel to it's critical temperature (not just red) to allow austenite to form, then quenching or rapid cooling to allow it to change to martensite. This freezes the grain structure of the steel in a very compact form making it hard, yet brittle. The tempering process that is done after this step, relaxes that grain structure a bit to make it stronger and less brittle. This step varies depending on the alloy, temperature, and time held at that temperature, as well as the toughness you are trying to get for the intended use.
Quenching a piece of 5160ish steel in water is just asking for a lot of cracks in the steel. Could be a spiderweb of micro-fractures to just popping in half. With the rail and spring welded together, you increase the chance because the two different alloys and masses will have different cooling rates. The thin piece of spring will cool rapidly, yet the thick rail will take longer. More so because of the gap between the two holding heat. When the spring cools and shrinks, the hot rail being thicker and not wanting to warp will just rip apart the spring.
Then you are going to start hammering on it at it's most brittle stage because you haven't actually tempered it.
The reason I said 5160 ISH, is because while 5160 is a common leaf spring steel, it is not the only alloy used. So without a mill spec sheet, you have no real idea what steel you are even working with to know the proper time and temperature for tempering without breaking test samples to test strength and examine the grain structures after trying different combinations.
I've done a lot of those stupid things starting out from "learning" things from people like that. That's why it irks me so bad. I've been through the stupid things and figured out the hard way how to do it correctly.
P.S.
Sorry if it sounded like I was yelling at you, I wasn't. People like that just irritate me and cause others a lot of headaches "teaching" them the wrong things to do.
You can still use a piece of railroad track, just don't mount it in the orientation it is normally used. Cut a little of the base away on one end to keep it clear of knuckles, and stand it on the other end. Use the end of the top rail as your striking surface. Grind it flat and smooth, and it will make a nice post anvil.g
Good to know, so forget the instructable and forget my dumb idea of a piece of actual railroad track !!!!!!!!!! all i was going by was what was shown online and as you can tell i dont know Anything about that and I prefer to learn from people like you since i know You know what you are doing..... we all good @ShawnF ? and BTW the razor you sharpened for me is still doing great, thanks again to you and monkey.....
The London and German pattern anvils are what everyone thinks of when they think anvil. Those are actually fairly modern in the big picture. Japanese swordsmiths still use a flat square striking block. The anvils used to tune saws are just a block also. Any flat relatively hard surface will work, but the trick is to get as much mass behind where you are striking. This keeps your energy in your work and not heading to the ground.
I started on a piece of rail track but it was mounted to look like an "anvil" instead of turning it on end. I hammered and hammered with minimal results. I got some pieces finished, but wasted a lot of propane in the process because I got such a small amount of movement per heat. So what I'm telling you is from learning the hard way and honest experience.
Mounted standing up, a rail, heavy forklift tine, 3 inch piece of solid round stock, sledgehammer head.... any of those will work just fine. Remember, you really only need as much area as your hammer head. The key is where the mass is. Realistically even with a London pattern anvil, any work not using the horn or hardy tool is done over the waist of the anvil. Because again, that's where your mass is.
We are definitely all good. I didn't have anything against you. I just just don't want to see people doing things the hard way and getting discouraged or even hurt because of someone that "knew" what they were doing.
was just trying to be "helpful" next time i'll keep my mouth shut and leave it to you guys......You can still use a piece of railroad track, just don't mount it in the orientation it is normally used. Cut a little of the base away on one end to keep it clear of knuckles, and stand it on the other end. Use the end of the top rail as your striking surface. Grind it flat and smooth, and it will make a nice post anvil.
The London and German pattern anvils are what everyone thinks of when they think anvil. Those are actually fairly modern in the big picture. Japanese swordsmiths still use a flat square striking block. The anvils used to tune saws are just a block also. Any flat relatively hard surface will work, but the trick is to get as much mass behind where you are striking. This keeps your energy in your work and not heading to the ground.
I started on a piece of rail track but it was mounted to look like an "anvil" instead of turning it on end. I hammered and hammered with minimal results. I got some pieces finished, but wasted a lot of propane in the process because I got such a small amount of movement per heat. So what I'm telling you is from learning the hard way and honest experience.
Mounted standing up, a rail, heavy forklift tine, 3 inch piece of solid round stock, sledgehammer head.... any of those will work just fine. Remember, you really only need as much area as your hammer head. The key is where the mass is. Realistically even with a London pattern anvil, any work not using the horn or hardy tool is done over the waist of the anvil. Because again, that's where your mass is.
We are definitely all good. I didn't have anything against you. I just just don't want to see people doing things the hard way and getting discouraged or even hurt because of someone that "knew" what they were doing.
That instructable reminds me of the razor shaped objects for sale on ebay and etsy, just because something looks the part doesn't mean it will play the part. The really cool looking things from china that are made from horrible pot metal and have no chance of ever taking an edge let alone cutting cold butter.
I think that "anvil" would actually work fairly well for some craft work like tin or leather and some light hammer work you might do on razors. I guess If I were going to make an anvil for light craft work I wouldn't bother with the leaf spring welded on top or any of the extra effort, just cut/grind the rail to shape and round off edges. I will say however, if one does go out and make themselves an anvil based on that instructable they will learn a few things along the way and will get some practice using their equipment. As you point out @ShawnF, it may not go as the instructactable suggests it will and they will probably become frustrated by the results ...or achieve the desired results and be happy enough.
I've seen railroad track used as an anvil, the trick is to orient the steel chunk so you get all the mass and none of the flex. It never ceases to amaze me how expensive a quality large anvil is.
My dad was a hoarder of hardware. When he would reclaim old wood I had to straighten the nails. He used a piece of rail with a groove for me to do that. We threw out dozens of cans full of nails, screws and miscellaneous hardware moving them to smaller quarters.
I was just about to say all this, but you beat me. Looks like you got it covered Shawn. Don't worry, I got your back, man.First of all, that's not a railroad track. That is from an overhead crane or a small transfer line for something like carts in a plant. A railroad rail has a much thicker top rail. It will also be rounded. More on one side actually from the train wheels. That piece of steel would never hold a 280,000 pound rail car, much less 50 to 100 (or more) of them.
Second, while you can use a piece of rail, you stand it up on end and use the end of the top rail (thick part) to put more mass under your work and hammer. Placed like that, the lack of mass and flex in the web take probably 80% of your energy away from your work.
I was just about to say all this, but you beat me. Looks like you got it covered Shawn. Don't worry, I got your back, man.
I had no doubt that if I wouldn't have said it that you would have made sure to make the appropriate corrections. I'm just glad I got it all right and you didn't need to correct me as well.I was just about to say all this, but you beat me. Looks like you got it covered Shawn. Don't worry, I got your back, man.
I agree with you. It is definitely like the razor shaped objects. There are so many shade tree mechanics basically that spout off a bunch of ways to totally do things the wrong way. I am guilty of trying a few of those methods before I learned to do things the right way. A rail track anvil was the biggest one. Everyone is obsessed with having something that looks like a modern anvil and will either sacrifice or not bother to learn the function over the look. I fell for it starting out. You can use them, and I made quite a few things including a couple knives on it, but once I got to something with some meat behind it, the difference was night and day.That instructable reminds me of the razor shaped objects for sale on ebay and etsy, just because something looks the part doesn't mean it will play the part. The really cool looking things from china that are made from horrible pot metal and have no chance of ever taking an edge let alone cutting cold butter.
I think that "anvil" would actually work fairly well for some craft work like tin or leather and some light hammer work you might do on razors. I guess If I were going to make an anvil for light craft work I wouldn't bother with the leaf spring welded on top or any of the extra effort, just cut/grind the rail to shape and round off edges. I will say however, if one does go out and make themselves an anvil based on that instructable they will learn a few things along the way and will get some practice using their equipment. As you point out @ShawnF, it may not go as the instructactable suggests it will and they will probably become frustrated by the results ...or achieve the desired results and be happy enough.
I've seen railroad track used as an anvil, the trick is to orient the steel chunk so you get all the mass and none of the flex. It never ceases to amaze me how expensive a quality large anvil is.
Truth be told for what I do I would be perfectly happy with a 200 pound or more sawyers anvil. That is just a large rectangle shaped block of steel with some feet and a hardened face. It's got the mass I want, but more importantly it's where I'd use it. Even a 200 pound London pattern has a small sweet spot. They have such a narrow waist that you loose mass as you get out towards the horn or heel.
I do hope to buy a new heavier anvil at some point, but sawyers anvils are next to impossible to find outside of a museum. The few you can find are usually dished pretty bad. I'll probably get a Peddinghaus made by Rigid. It's a German pattern double horn, but they have a thicker waist than a London pattern. So more mass where I want it.
A less expensive route for a "real" anvil is NC Tool. You can get a 70 pound farrier's anvil for under $300. Perfectly serviceable anvil and not ridiculously priced. The only real complaint I've heard is from people wanting bigger, or that the faces are a little softer than some others. But for starting out they are hard to beat. I was this close to hitting the buy button on an NC anvil, but then the one I have popped up locally.
The great thing about sawyers anvils is that many people don't know what they are so you can sometimes get one for cheap, but if they do know what they are they have a premium price. Finding reasonably priced anvils is getting harder by the year. Glad I have two decent anvils 
So I got some time to play today and made this.....
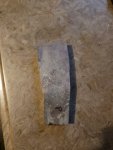
Now before you go saying "Aww man... I tuned in for this?!?" Here is what I did to make it that you may find a little more interesting. And I'm hoping @NurseDave will be around to tell me if I did it correctly.
I took 5 layers of 15n20 and stacked 3 layers of 1095 between them. (8 layers total)
My stock is an inch and a half wide and I cut it at 2 inches long. This gave me a stack just about 5/8 of an inch. (.620) I cleaned them with de-greaser and knocked all the edges off, stuck the stack in the vise and welded the sides together, then threw it in the forge.
I took it to dull red, fluxed it then put it back in. I let it soak until it hit 2250F (about all I can get out of my forge it seems), fluxed it again and put it back in to soak a few minutes.
I pulled the stack out and started to tap and set the welds only keeping it out briefly so I wasn't getting it too cool. Did that 2 more times then started to try and move it.
I got it to between 1/4 and 7/16 thickness, varying from just over an inch and a quarter to 1 inch in width, and drawn out to three and a half inches in length.
I ground the edges just enough to clean them up and took them to 600 grit and here is what it looks like.
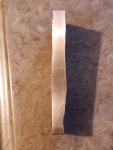
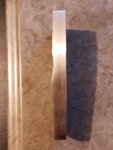
I've got a piece of pvc pipe for my ferric chloride, but I don't have ends for it yet, so I did a quick vinegar etch.
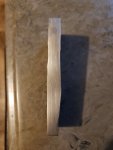
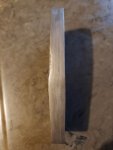
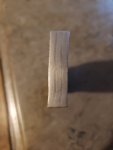
Not quite sure what I'm going to be able to squeeze out of such a small billet, but I was more interested in beating the crap out of it to see if everything held. So far it looks like it went well!!

Now before you go saying "Aww man... I tuned in for this?!?" Here is what I did to make it that you may find a little more interesting. And I'm hoping @NurseDave will be around to tell me if I did it correctly.
I took 5 layers of 15n20 and stacked 3 layers of 1095 between them. (8 layers total)
My stock is an inch and a half wide and I cut it at 2 inches long. This gave me a stack just about 5/8 of an inch. (.620) I cleaned them with de-greaser and knocked all the edges off, stuck the stack in the vise and welded the sides together, then threw it in the forge.
I took it to dull red, fluxed it then put it back in. I let it soak until it hit 2250F (about all I can get out of my forge it seems), fluxed it again and put it back in to soak a few minutes.
I pulled the stack out and started to tap and set the welds only keeping it out briefly so I wasn't getting it too cool. Did that 2 more times then started to try and move it.
I got it to between 1/4 and 7/16 thickness, varying from just over an inch and a quarter to 1 inch in width, and drawn out to three and a half inches in length.
I ground the edges just enough to clean them up and took them to 600 grit and here is what it looks like.


I've got a piece of pvc pipe for my ferric chloride, but I don't have ends for it yet, so I did a quick vinegar etch.


Not quite sure what I'm going to be able to squeeze out of such a small billet, but I was more interested in beating the crap out of it to see if everything held. So far it looks like it went well!!
Personally I do a roughing of the services with some flux when stacked originally. But I do agree that step if optional and seem like to worked fine without it.
:: Dave steps back to see if that’s even in the realm of reality ::
:: Dave steps back to see if that’s even in the realm of reality ::
I was a little worried about a gap occurring between the layers not allowing for a proper forge weld if I fluxed it before welding the edges together. That's probably just me being inexperienced though.Personally I do a roughing of the services with some flux when stacked originally. But I do agree that step if optional and seem like to worked fine without it.
:: Dave steps back to see if that’s even in the realm of reality ::
